Introduction
In this modern world, we always seek the best option available in the market. When it comes to computer systems, we always want the latest version to work efficiently. However, not everyone needs a high-end system for their daily work, but what if you have one? Well, they will try to utilize it surely with different notions and passions. Here, we have Raspberry Pi 5 M.2 HATs to enhance the power of Raspberry Pi 5, a fast computer that has a unique silicon design.
Raspberry Pi 5 M.2 HATs are the latest version of external hardware that can be attached to the top of your computer to enhance the power, storage, and capabilities of your computer. Here, we will focus on the process of making your Raspberry Pi 5 computer efficient by installing the external hardware- Raspberry Pi 5 M.2 HAT. Are you excited? Let’s check these out!
What Is Raspberry Pi 5?
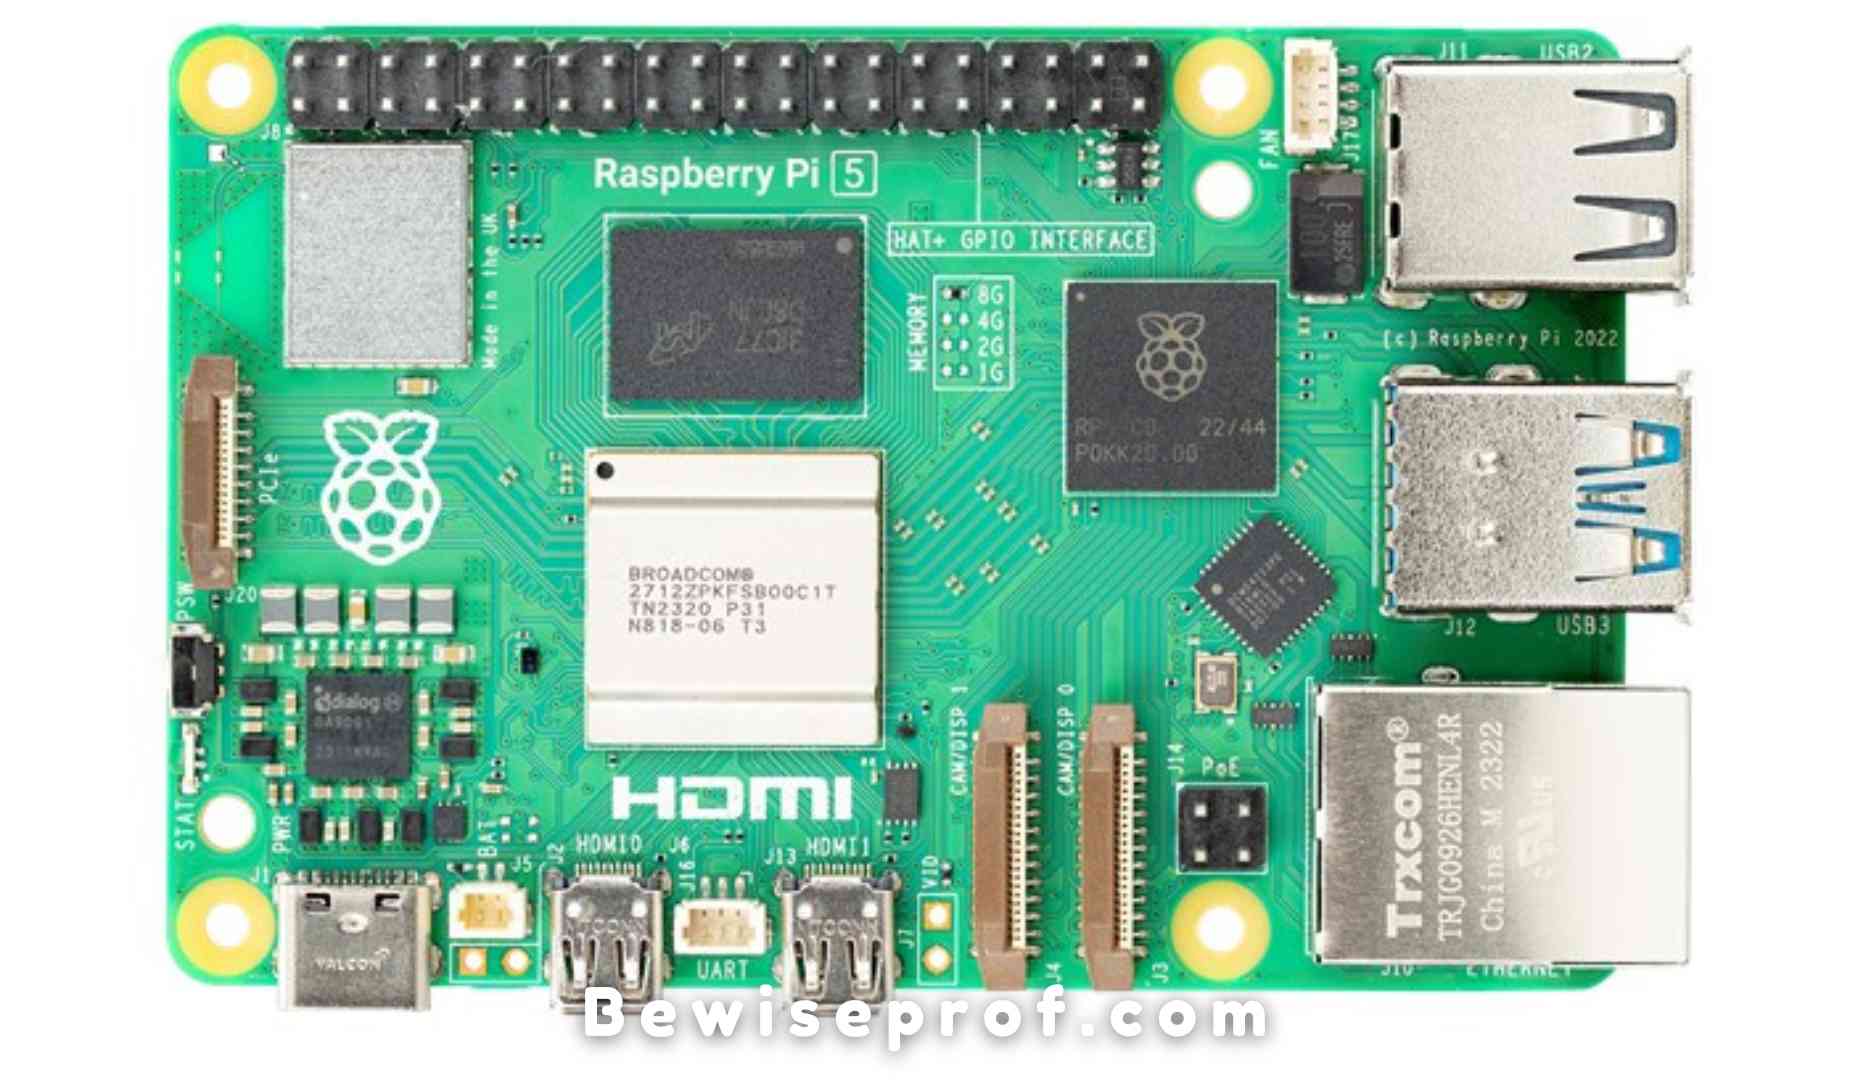
Raspberry Pi 5 is the latest model in the Raspberry Pi series of single-board computers. It is a powerful yet affordable computer designed in the house in Cambridge, UK. Well, the power says it all! The computer can be used for a variety of projects, from basic programming to advanced machine learning.
- CPU: It comes with 2.4GHz quad-core 64-bit Arm Cortex-A76 CPU. apart from that it adds cryptography extensions to the hardware.
- GPU: It has the powerful VideoCore VII GPU. So it supports OpenGL ES 3.1, Vulkan 1.2
- RAM: 4GB
- Storage: 64GB
- Display: 7-inch IPS touchscreen display
- Connectivity: 802.11ac WiFi & Bluetooth 5.0
Well, the storage may come in more versions. However, these features are making it easy to connect to the internet and other devices. Apart from, it’s compact size, low power consumption, connectivity and more versatile features. The Raspberry Pi 5 is a popular choice for many makers, students, educators, and hobbyists around the world.
Things To Consider When Buying Raspberry Pi 5 M.2 Hats
When it comes to buying Raspberry Pi 5 M.2 HATs, there are a few important things to consider. These tiny extension devices can greatly enhance the performance and power capabilities of your Raspberry Pi computer.
However, not all HATs are created equal. From power and monitoring to profile and installation, things can be different for different extension processes.
Here, we will take a closer look at the key factors you should keep in mind before making a purchase.
So, let’s dive in.
Power
Try to consider The FPC PCIe ribbon!
This particular ribbon can provide you with a minimum of 5W continuous power. The power is a crucial factor when going for an external capability booster. If you do not get the power to preserve the capabilities, it may lead to dissatisfaction after you buy it.
So, before you buy a Raspberry Pi 5 M.2 HAT for your Raspberry Pi 5 computer, try to consider its power.
Monitoring
If you have the power, you also need a better power supply. Well, interestingly, Raspberry Pi 5 M.2 HATs have an I2C interface.
What does this do?
Well, it helps to monitor the power supply process in real time. The purpose is to diagnose the power supply bus and create a streamlined channel from the computer.
Profile
If you are going for a Raspberry Pi 5 M.2 HAT, you will find it as a low-profile extension process.
Why?
Well, the design decides it all. If you look at the design of the capability booster for your Raspberry Pi 5, you will see how low-profile and minimalistic it is to the Pi 5 + SSD.
Installation Of Raspberry Pi 5 M.2 Hats
Consider the following steps to add Raspberry Pi 5 M.2 HATs on your Raspberry Pi 5 computer.
Step 1: Connect the M.2 HAT’s aerial adaptor to the cable from your Raspberry Pi 5 aerial.
Step 2: Set up the Raspberry Pi with the newest version of the Raspbian operating system. Here, you can follow the guide to deal with your Raspberry Pi 5 and its attachment to the latest Hat.
Step 3: Now it’s time to Start up your Pi with a terminal window. Run the commands instructed by your seller and install the particular setup software to attach the HAT on the top of the Raspberry Pi 5.
Step 4: During the installation, you will be asked to choose the administrator account name and password. Don’t go for tricky details, as you will need these later. Try something that you can remember and go for it.
Got the idea?
What are you waiting for?
Dive into the realm of the latest powerhouse and work efficiently on your monitor.